
Hi Guys,
I would like to speak about this powerful tool that we have on AX7 now. I couldn’t find much about it on the internet and even the post about it on the Ax-wiki isn’t complete. For this reason I decided to write about it, but before begin I recommend to you became familiar with the concepts from VSTS.
Basically what we are going to do is setup a build definition inside the VSTS where each steps are responsible for perform a task inside our local environment, create a new local agent with the required permissions for execute the tasks and create a schedule for the new build as we want.
First of all you must create your own account and a new project inside VSTS and after synchronize it with your local VM. If you don’t know how to do it you can follow find an explanation about how it is done here.
You must create you folder root as the following image:

Once it is done, you have to add your files for the respective folder and perform a check-in for upload these new files for your VSTS project.
Setup a local agent:
This agent will be responsible for perform every action inside your local environment through the DynamicsSDK scripts that we previous uploaded to the VSTS account. These scripts files are located on the C:\DynamicsSDK path from your VM. See the steps below for a full explanation:
- Go to your DynamicsSDK folder and unzip the agent.zip file.
- Run the PowerShell as administrator.
- Enable PowerShell to run downloaded scripts signed by trusted publishers and confirm the change in policy with the command: “Set-ExecutionPolicy RemoteSigned“.
- Change to directory where you unzipped the agent with the command: “cd C:\DynamicsSDK\agent” .
- Unblock the PowerShell scripts with the command: “Get-ChildItem -Recurse * | Unblock-File“.
- Run the configuration command for the agent: “\DynamicsSDK\ConfigureAgent.cmd”

- From now on the command line will ask you about your agent properties. Set your Agent name, the default option is “Agent-Machine name”.
- Enter the URL from your VSTS: “https://{your-account}.visualstudio.com“.
- Choose which pool you want to setup the agent. The default is ‘Default‘ pool.
- Enter the path of work folder for this agent. The defaul is the root folder of the agent.
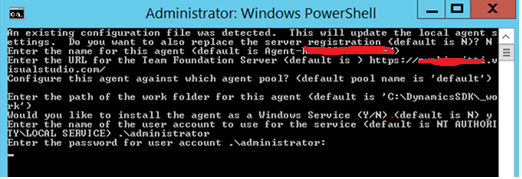
- Set your agent to installed as a windows service.
- Set the user credentials for the agent windows services. I recommend you to use the local administrator. The default option is the local service account.
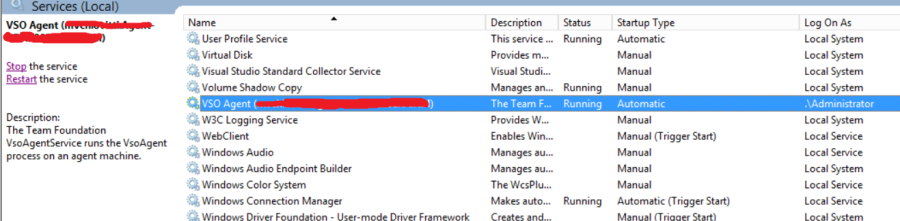
- A Microsoft prompt should be opened for you enter with your VSTS account. After that you can see the agent status on the control panel:


If you’re working with a free VSTS account this would end the agent setup, otherwise you can setup more one agent for each pool. The picture bellow illustrate the build architecture:

Build Definition:
I have to confess that I found these next steps a little bit trick just following the Microsoft post about it because I wasn’t used to work with VSTS. Now that I’ve done once I can assurance you that isn’t rocket science :).
- Create your build definition and name it as you want.
- Set your predefined variables at the variables tab page:


Can you tell me where to download the agent software? There is no agent.zip in my D365 c:\Dynamicssdk\ folder…
Thanks!
LikeLike
Hi Rob, it might be because your environment topology used when you deployed your environment! You might be using a demo environment instead of a dev environment.
LikeLike